
|
|
...at margotbean.com
I was recently shocked to discover that Realms of Illusion (previously known as Sentinel: Descendants in Time) installed and played perfectly on my Windows 7 computer! I ran both the installer and game executables in compatibility mode for WinXP SP2 (as administrator), and found no problems.
Since this game is going to endure through at least one more Microsoft operating system, and since it's full o' challenging puzzles, I figure that writing a walkthrough is worth the trouble. Although severely annoying in spots, Realms of Illusion is, overall, a worthwhile pastime.
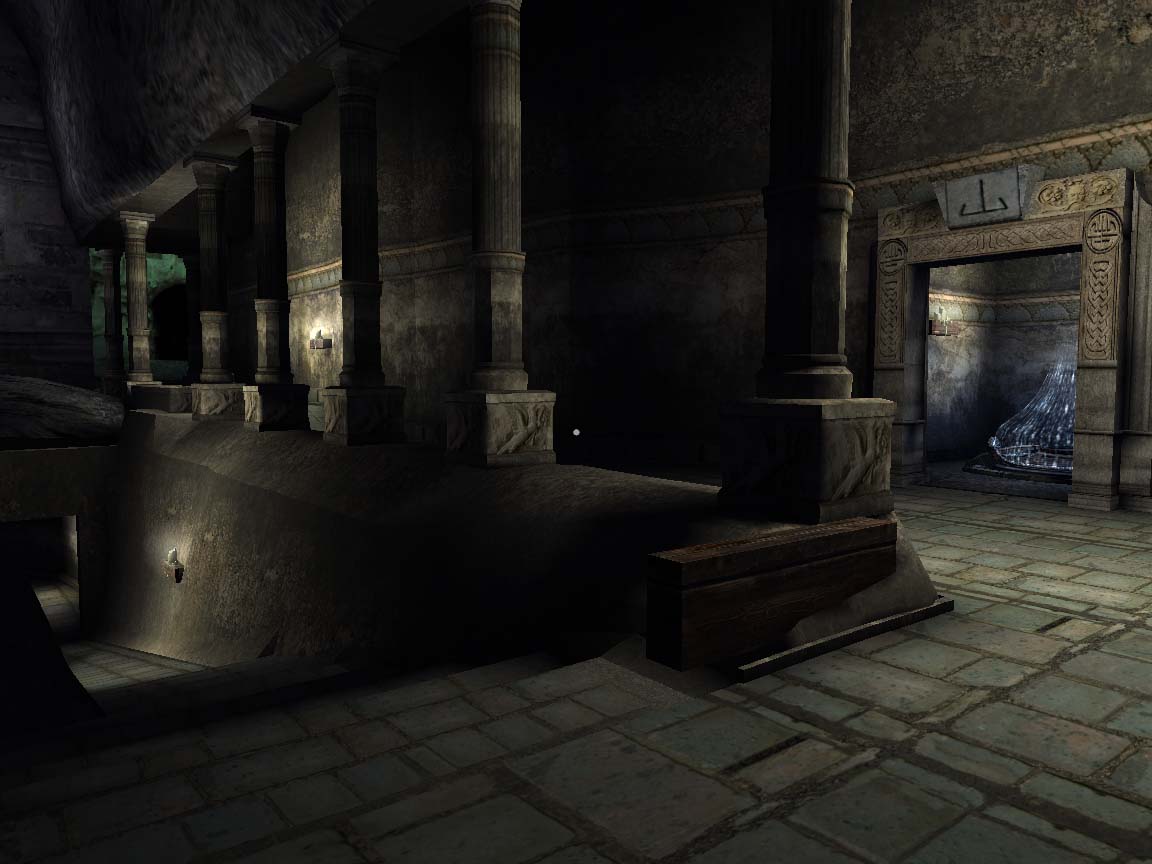
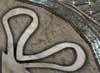
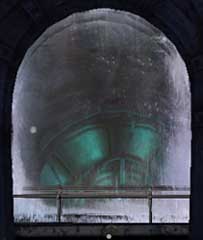
Go forward (with "W" or the right-mouse by default) until the cutscene with Dormeuse. Despite appearances, she is not the tomb's official call girl, she's the sentry.
|
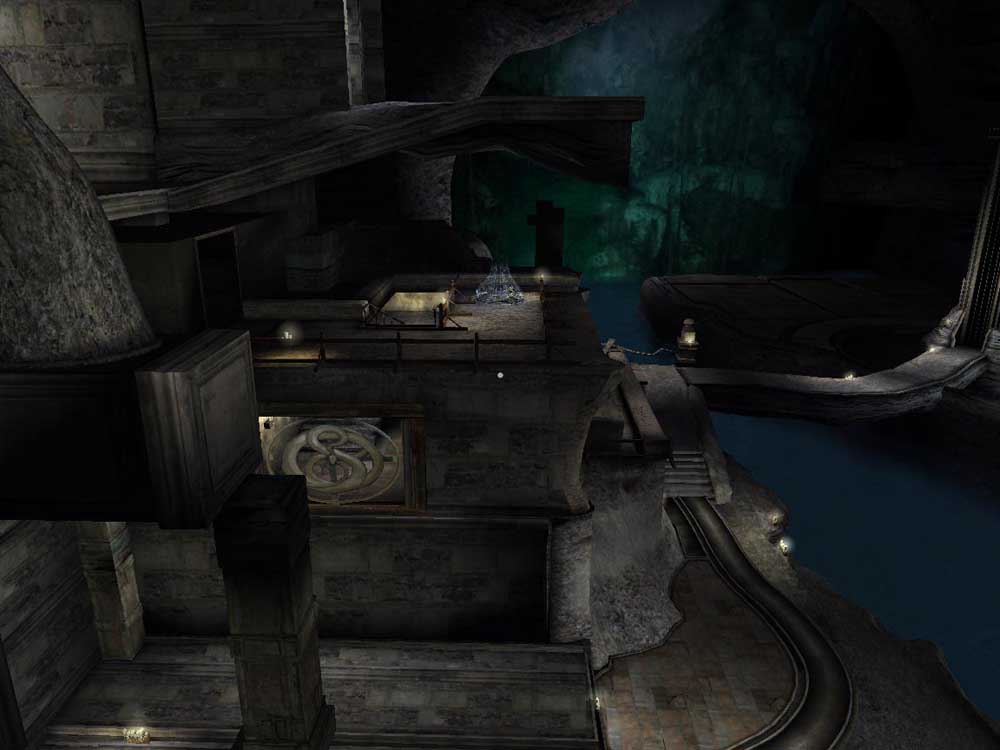
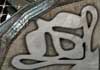
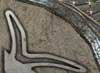
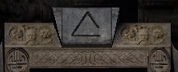
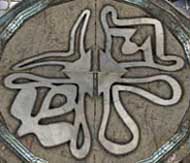
After the cutscene, go forward up the stairs. Stop at the top of the stairs, and take note of the symbol atop the doorway ahead. Instead of going towards it, though, turn left at the top of the stairs and go up the ramp. Turn right, and go through the square doorway into the little room. Pan left. Go up that staircase (two flights) to the top. Turn right. Notice the arrow visible in the center of the screen? It's pointing left. But, you have to go up before you can go left! (I'm afraid you can't get rid of the arrows by turning hints off, either.) |
 |
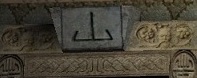 |
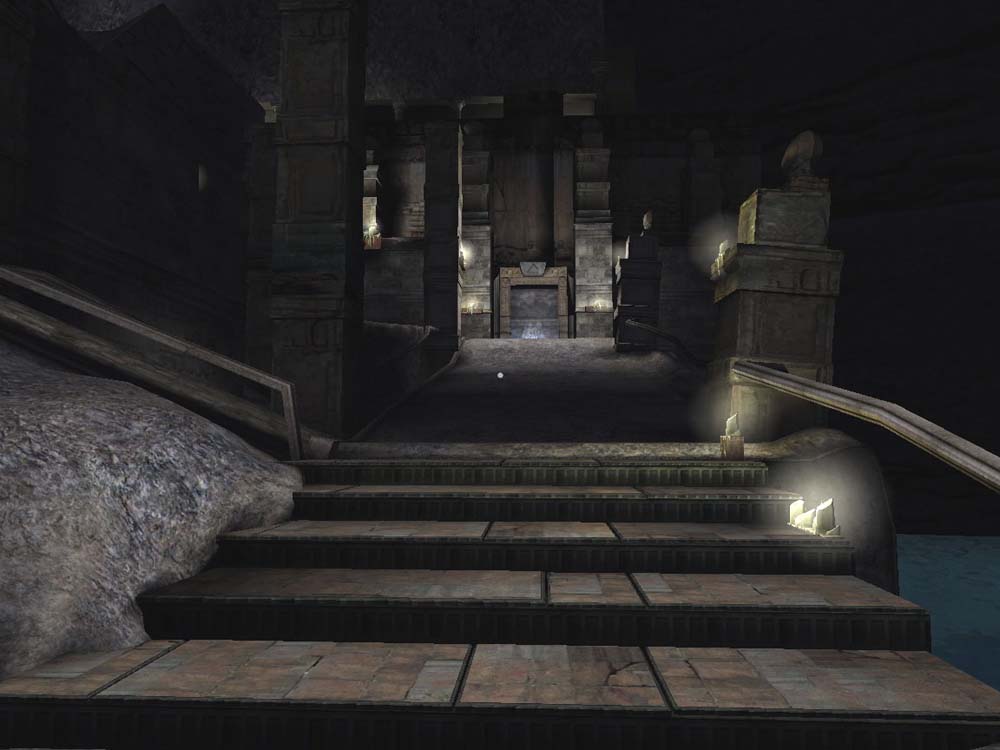
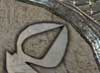
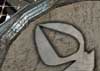
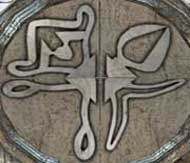
Go forward through the doorway (ignore that bit on the left - it's a dead end), follow the path around to the right, up the ramp and stairs, then turn left. Take note of the symbol above the doorway. Go forward, then left and up the ramp. Turn left and go up another ramp. |
|
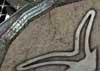
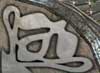
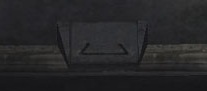
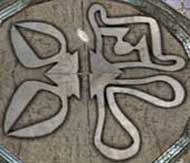
At the top (don't worry, you can't fall off the edge), turn right and go forward a bit, then right and down the ramp. Turn left and go forward until you're in front of the walkway on your left. Pause, look right and take note of the symbol atop the doorway. Then turn around and go to the end of the walkway. "Something's not right here. ...Why hasn't she just killed me outright?" (It would be an awfully short game, then, Beni.) |
 |
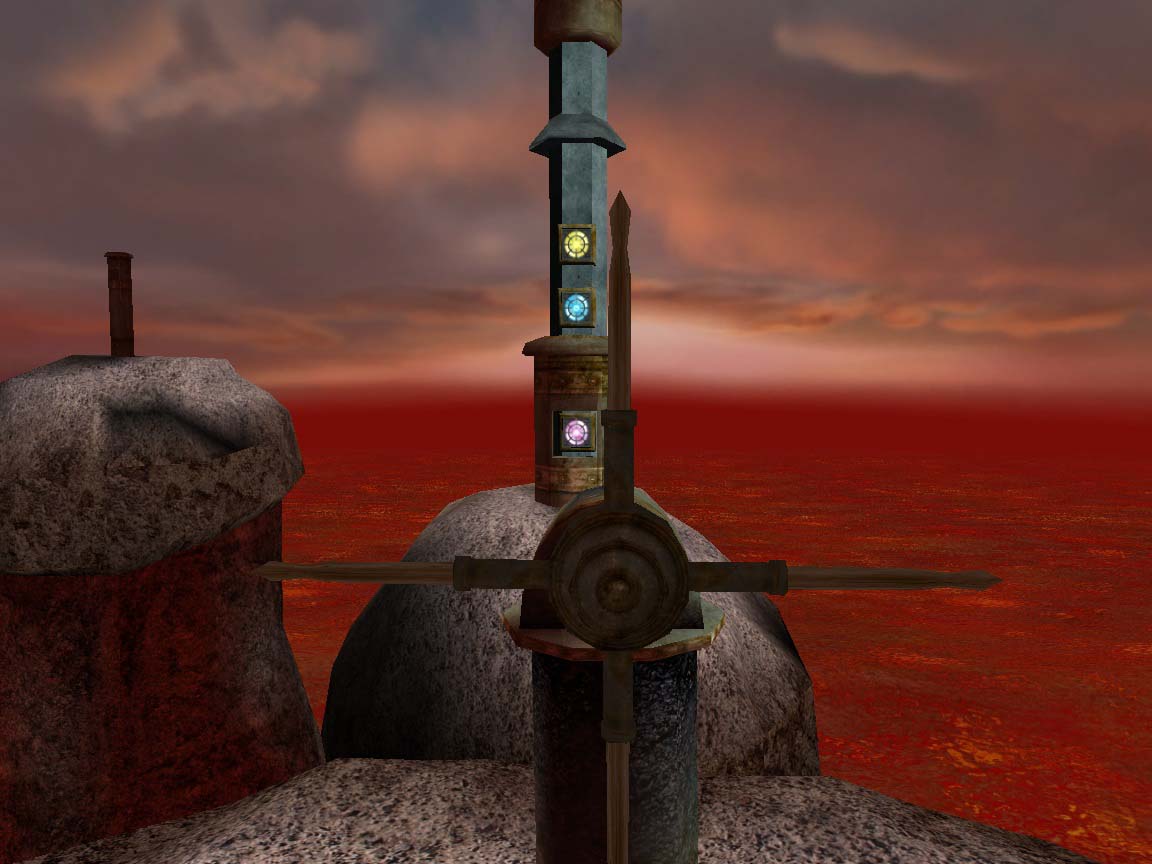
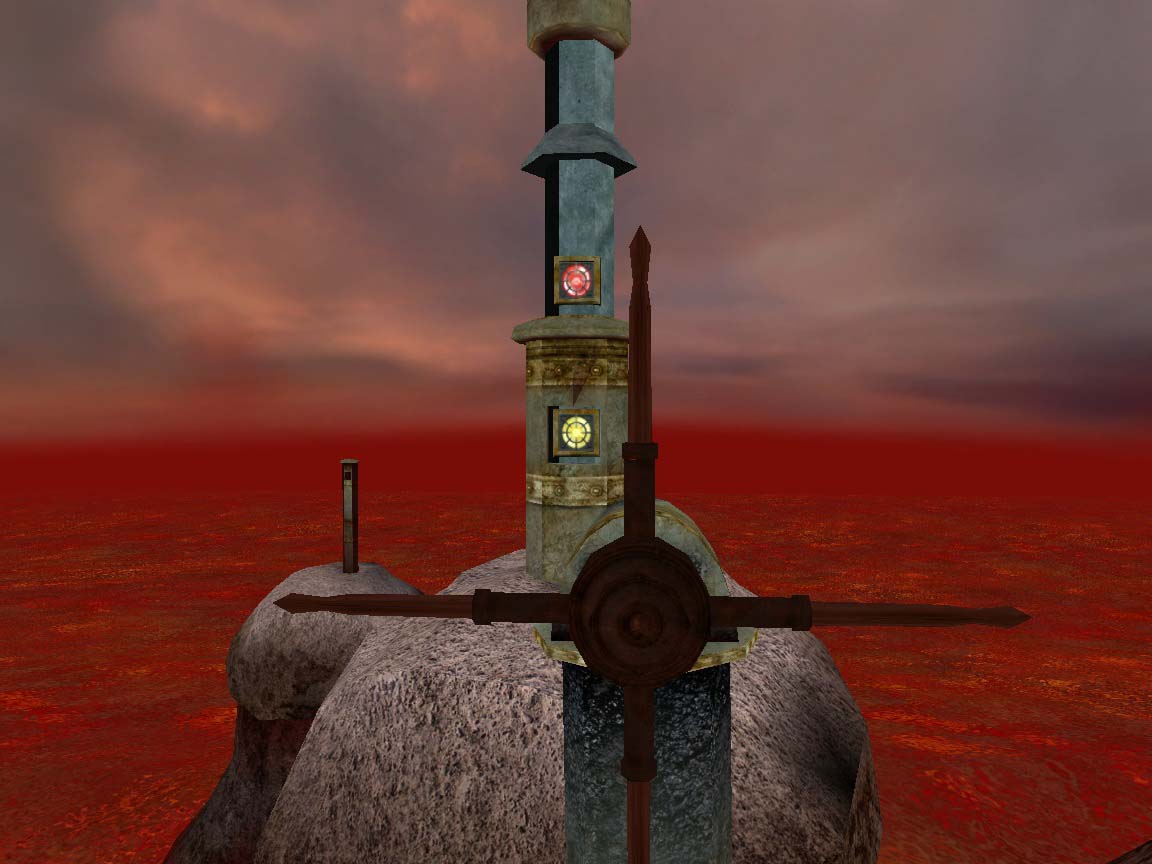
Go around the circular table-contraption and see a control panel. Left-click on it to zoom in.
Hint: Some of those symbols can be seen elsewhere in the tomb.
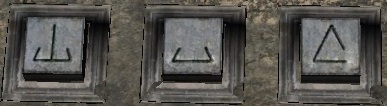 |
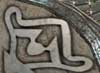
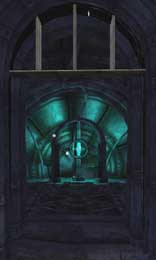
In any order, input the three symbols you've seen so far in the tomb. A portal activates, and there's a cutscene with Dormeuse. She accuses you of being some kind of computer AI created by her. Weird. Go forward all the way to the newly opened portal, and go through it. |
|
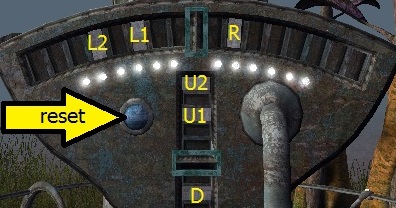
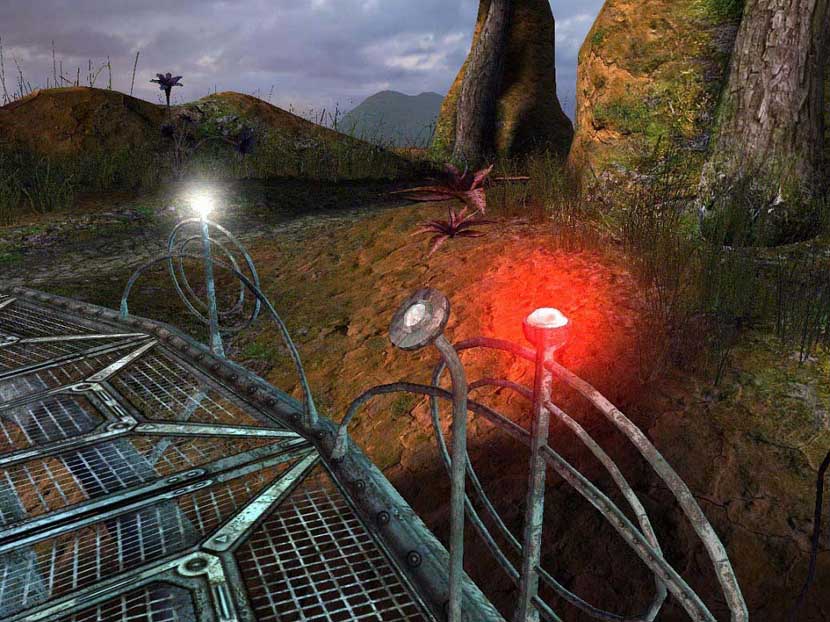
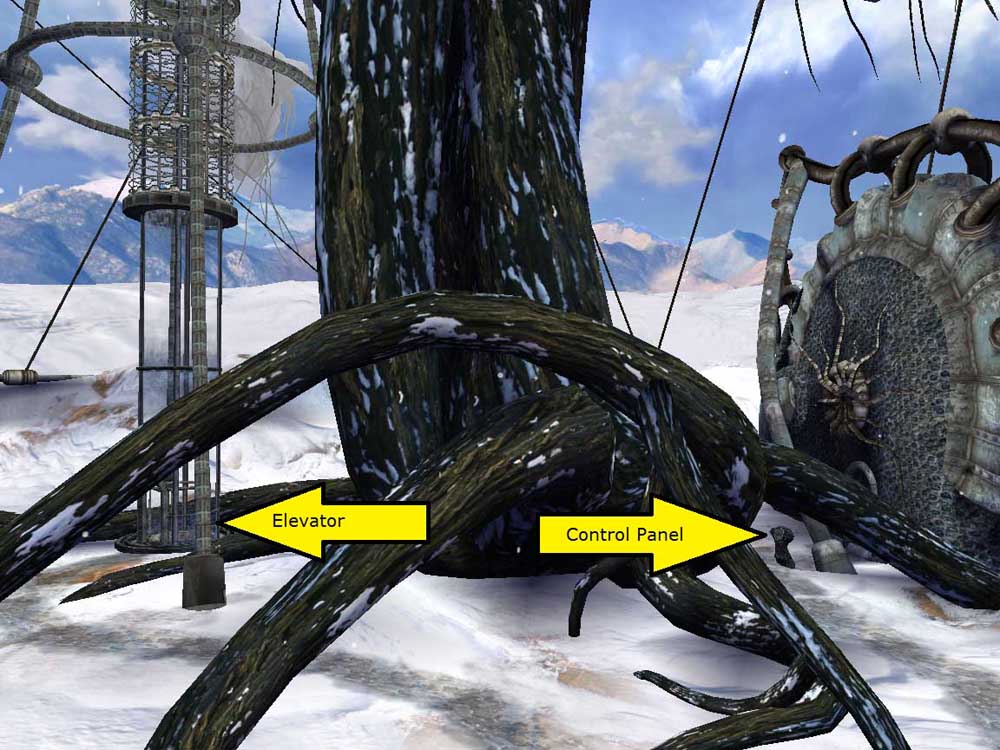
Go forward a bit, over the metal doorstep, and stop short of the large metal platform. Turn left and go forward on the stone path until the cutscene with Dormeuse. Another weird one. Pan left, then step on the metal lift platform. At the top, turn around and go forward to the fan-shaped control panel stand. Left-click to zoom in. Hint: Shine the light on every plant to power the elevator. (Didn't we just take the elevator to get here?) The large blue button on the left resets the puzzle. The twelve lights across the middle indicate you have twelve moves in which to light all the plants. To move right/left, click on the solid rectangles across the top (labeled L2, L1, and R). To move up/down, click on the solid rectangles in the center column (labeled U2, U1, and D). |
 |
 Bugs: No! |
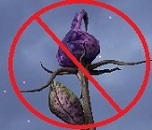
Note: Be prepared for the fact that it will look like you have the right spot, but you don't, 'cause the flower won't light. Also, the little pink bugs buzzing around the flowers are meaningless...when you light a plant you will see purple electricity lines dancing around it! When you get two in a row, you'll see the electricity connecting them. Solution: R U1 R D L1 D U2 L2 R D. "That was too easy." Grrrrr |
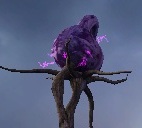 Electricity: Yes! |
 Elevator button |
Turn around and go back down the lift. Turn around, and go to the metal platform you just lit up. Go right or left around the circular walkway, and hit the white button next to the flashing red light. The elevator ascends. Go back to the opening you entered by. See four control panels. Hint: Make all lights blue using one switch on every panel. Oh boy; thirty-two switches. We're not going anywhere for a while, are we? If you play around with the switches, you may notice that each switch (by itself) turns fifteen lights red, and leaves five off. If you combine two switches (two panels), you see that two "hits" turn a light yellow. Three turn a light blue, and all four produce a stream of water from the light. Two adjacent blue lights produce a blue laser between them (forming a step in the bridge). So, you're gonna want each light to be "hit" three times. |
|
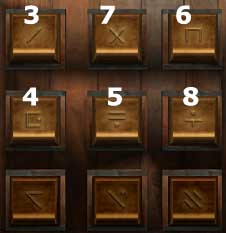
You can make a chart of which switches control which lights (by flipping them one at a time), and it will help...but the solution is still time-consuming. You're looking for the combination that leaves each light dark exactly once. You also have to deal with the annoyance of walking around the panels to get a clear look at the lights each time you test the leftmost and rightmost panels. Ugh! Solution: From left to right, hit switches 8 3 6 4. Go around the panels and up the blue light-bridge. At the top, go right and around through the mesh tunnel until the cutscene with Dormeuse. "Despair is the real enemy here." After the cutscene, turn around and go to the dome between the spinning flowers. Head to the center. |
 My lovely OpenOffice.org chart |
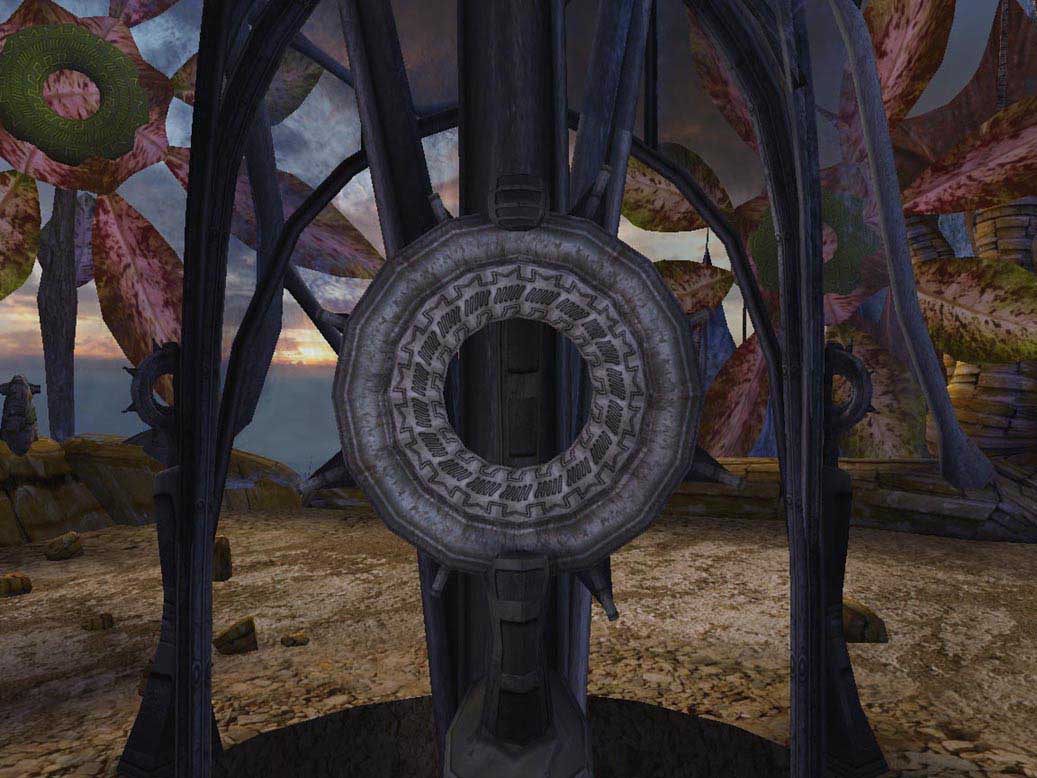
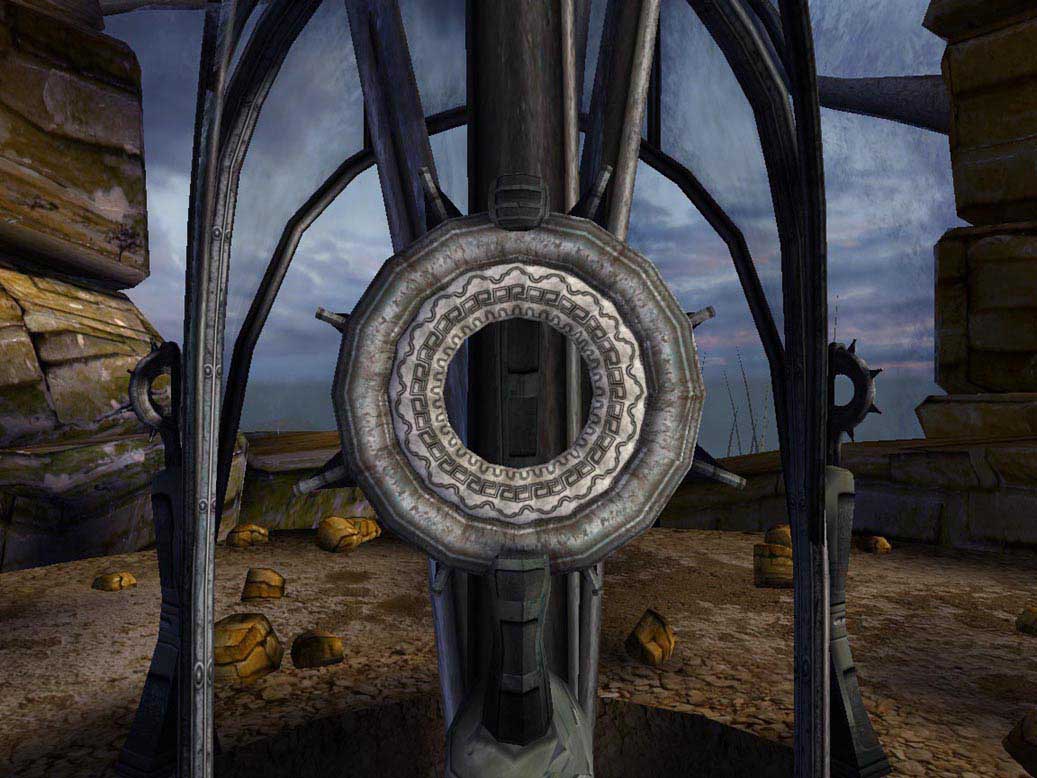
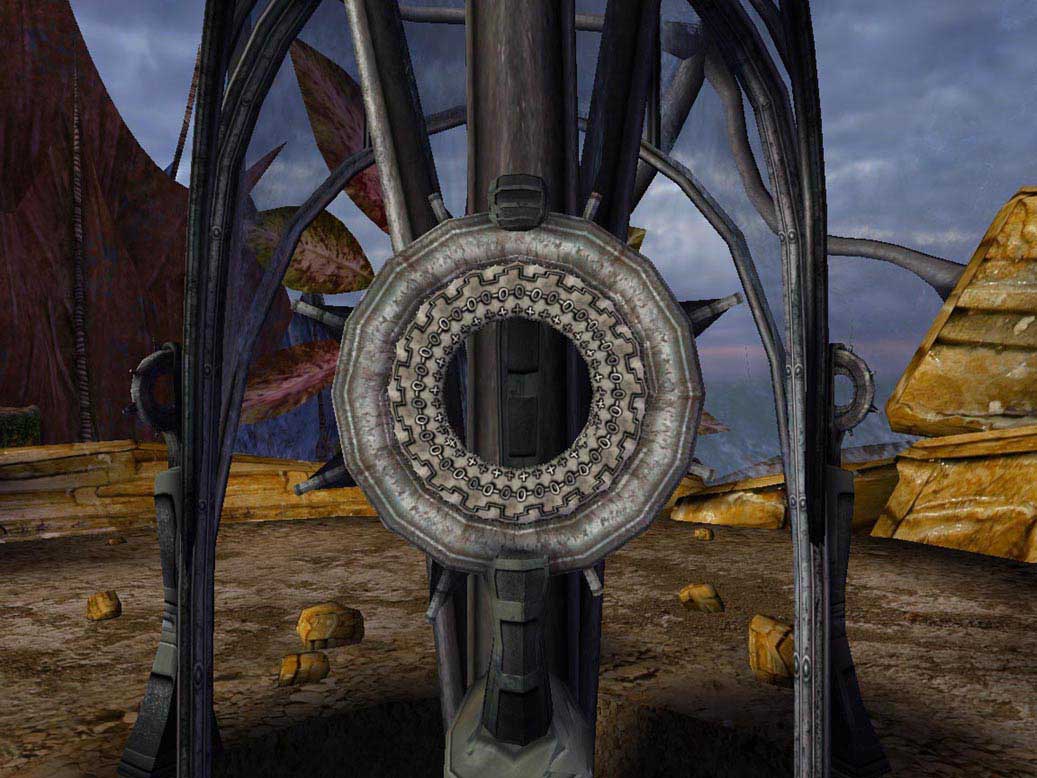
Hint: Match the patterns on the elevator with patterns on the sunflowers. Petals lengths are important.
Pick a sunflower and watch it a while. You must match its center patterns with those on one of the circles in the center of the structure. When you have the right circle, you must imitate the flower's petal lengths (long or short) by clicking on the spokes around the circle. Click once to shorten a spoke, twice to restore it.
To make it more difficult, the sunflowers' center patterns and petals are moving, but there are levers in front of each sunflower to stop its movement. You have to stop it at the right time to see the correct position of the petals. (Note: it's not necessary to stop the flowers to solve the puzzle.)
Solution: Click only on the spokes marked "short" below...
 |
 |
 |
When you have all three right, a wooden platform in the center of the structure raises. Step on it to go down (use the space-bar to jump if you get caught on the sides). At the bottom, spin around until you see an arch with a blue light in its center. Go there. Left-click on the center to take the object. "It's a crystal of some kind." Return to the elevator area, and notice that a portal has now been activated. Step into it, and return to Tomb 35.
Go forward from the Tregett portal to the end of the walkway, to the table-like control panel. Left-click on it to place the crystal in it. A symbol projects on the ceiling. More dialog with Dormeuse.
From the walkway, spin around and notice that another portal has been activated down below. If you explore the tomb, you see that actually three new portals have been activated. It's your choice which to explore first. If you're looking for a suggestion, go to Maru (it's the easiest).
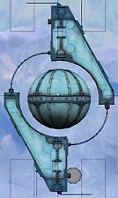
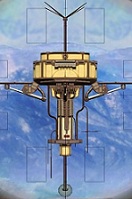
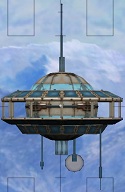
(Click the pictures below for a screenshot of the portal location, click the name of the world to go to that walkthrough section.)
Maru
|
Corabanti
|
Eska
|
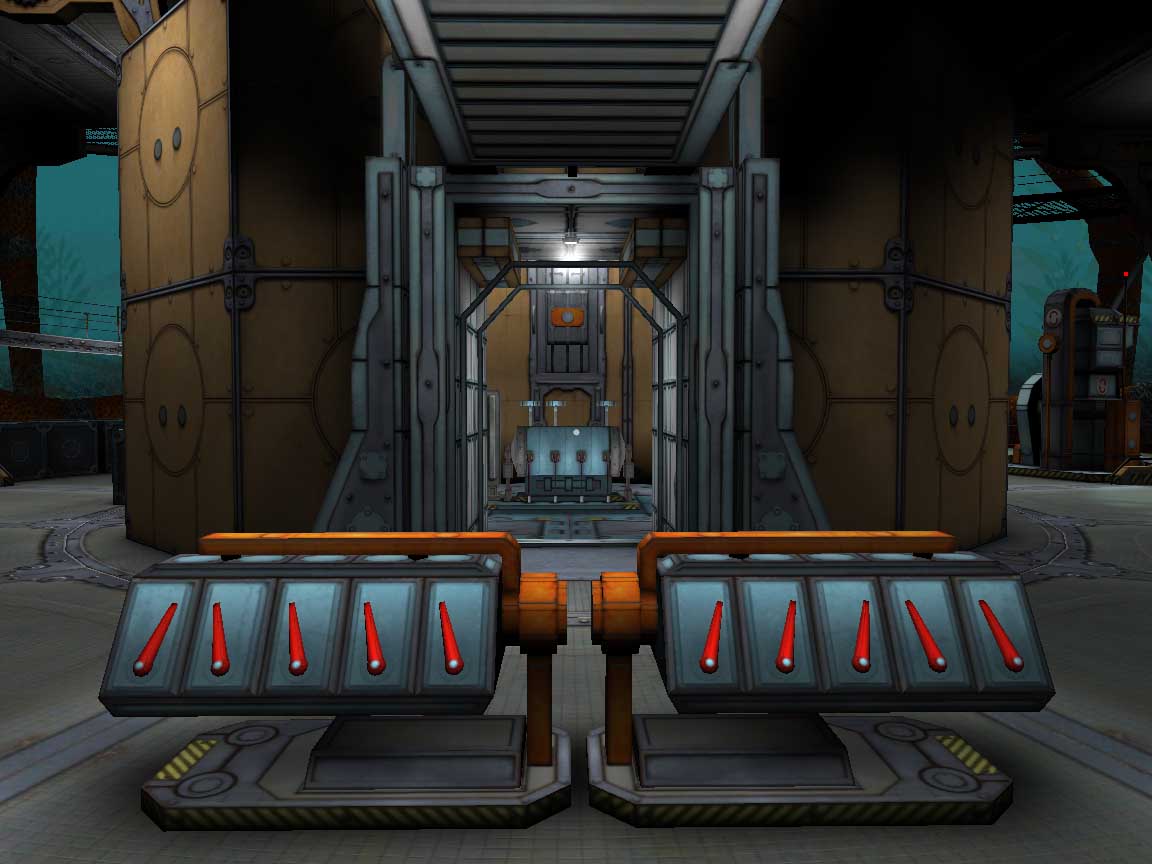
Go forward, down the walkway towards the orange button.
Hint: Make your way through labyrinth - rotating the walls with holographic buttons
Step on the center platform and the elevator ascends. At the top, directly above you is the crystal you need. Of course, jumping with the space-bar won't help you grab it.
Go forward until the loooong cutscene with Dormeuse/Tamara. Afterwards, go back to the center of the platform, to the green beacon. (If you accidentally step on the center platform, you'll go down the elevator to the labyrinth, and probably curse a bit. I did.)
Hint: Match the color sequences from the satellites with sound sequences played through big horns.
Walk around the beacon until you find the lever and click on it to hear the sound associated with green.
If you feel like it, explore the entire science station and find the other colored beacons - yellow, purple, blue, and red. You have to take a special lateral elevator on the outer ring of level I to get to the red beacon. (You'll know you've found the right elevator if the middle button is blank.) There's a cutscene with Dormeuse to reward you for finding it. (Don't worry, she'll find you in Eska or Corabanti if you skip it here.)
Back on level III (where we arrived), notice the four satellites in the sky around the science station. There are also four periscope device for viewing the satellites close-up. Each satellite is flashing a different colored light sequence (four colors, with an extra long pause between cycles). To solve the puzzle, you need to write down the satellite's sequence, then go up the circular metal staircase just to the left of the periscope. The "big horns" the hint spoke of are located at the top of the staircase. Enter the satellite's color sequence using the sounds associated with the colors.
Note: all the sound panels are keyed the same (same button = same color on every panel), but there are six buttons and only five colored beacons. We have to use process of elimination to deduce the white button.
Solution: The buttons from top to bottom are:
|
 yellow, red, purple, green 4 1 6 2 |
 yellow, blue, green, red 4 3 2 1 |
 green, yellow, white, purple 2 4 5 6 |
 purple, blue, green, white 6 3 2 5 |
When you get a satellite's sequence right, it repeats the sequence, then sends a blue beam to the center of the station, lowering the crystal a bit. When all four are correctly entered, the crystal is within reach. Go to the center of the station and click on the crystal to take it. The elevator descends.
Go up the ramp to the exit portal, back to Tomb 35. Place the crystal in the "waystone" at the end of the upper walkway.
(If this is the second or third crystal you've placed - other than the Tregett crystal - you may notice that two new portals have activated: Goda and Sanselard.)
 |
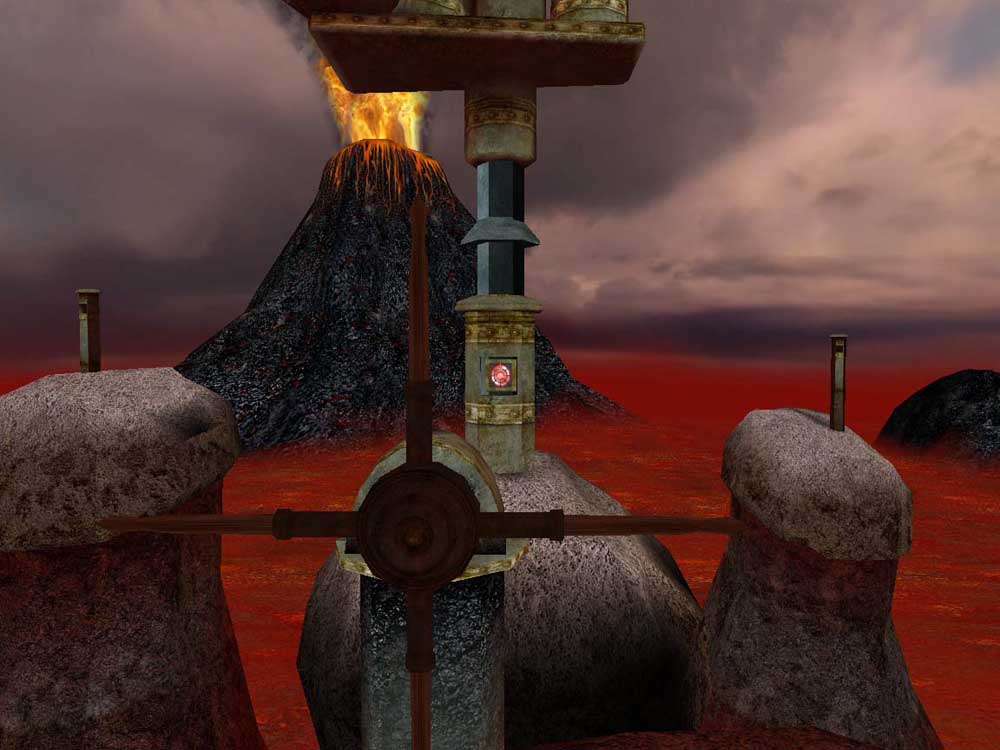
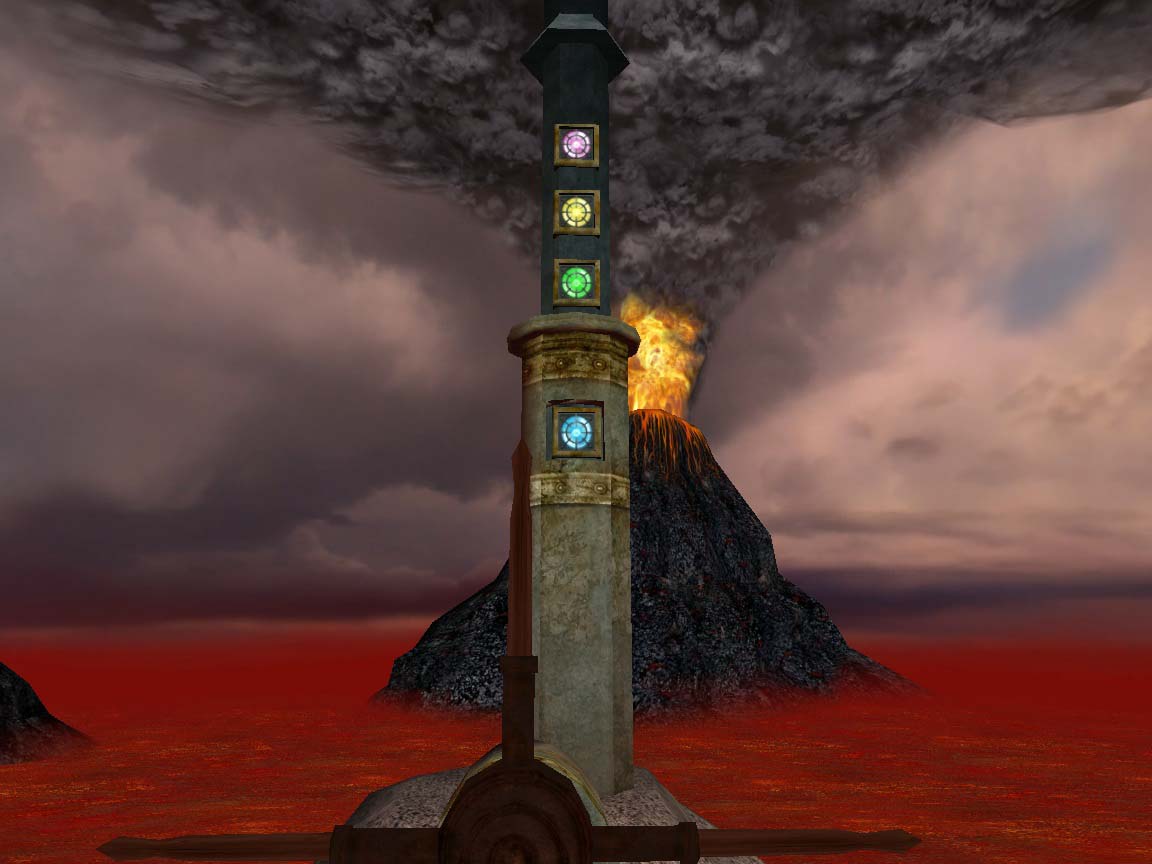
From the arrival point, go forward, slightly right, and up the ramp. Head right until you see the doorway on your left. Go in and down the steps. Ahead is the crystal, but we can't grab it yet. Instead, turn left and go up the stairs. Click on the book on the table for a closeup. This will be valuable information later. For now, turn around and head back out. Instead of leaving, though, turn right at the top of the stairs. See that red light? It's an elevator button. Click it. At the top, have a look around. Hint: Build paths to all five volcanic pumps. These paths rotate only when they can make a connection with an already built path. |
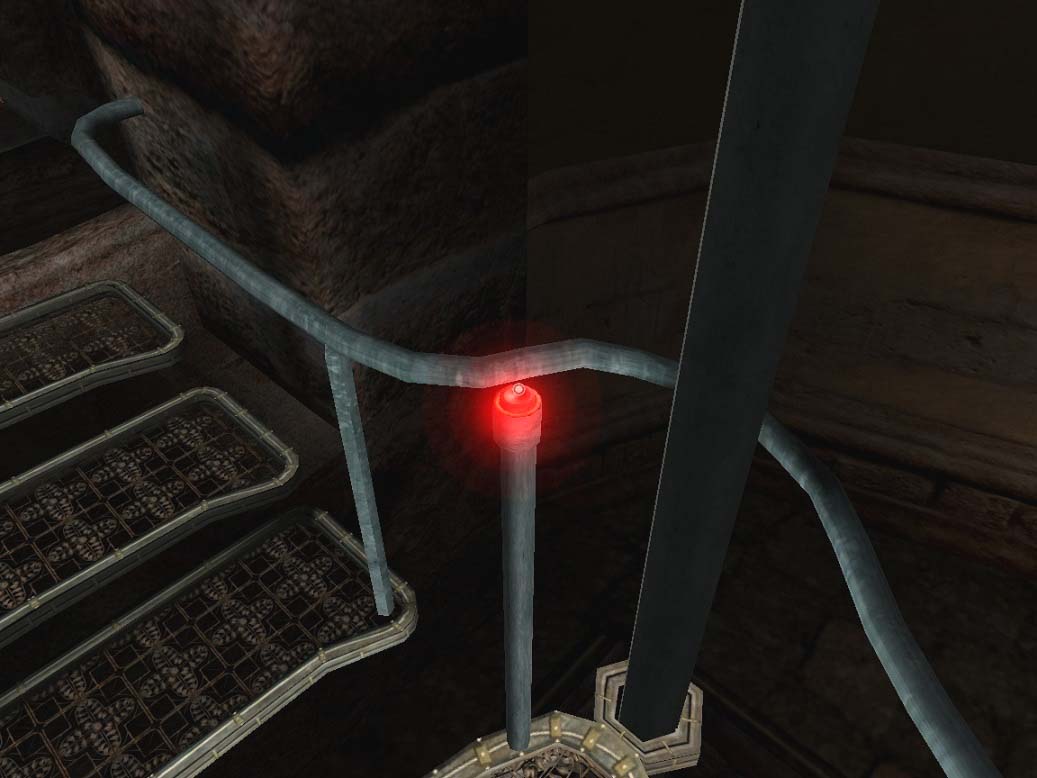 Elevator button |
Each island has nine bridge sections, and each section has an associated symbol. Copy down each symbol (use the periscope on the ground at each island, which is necessary, but terribly disorienting). Then go back up to the tower. For each bridge section you want to rotate, find the associated symbol on the revolving control panel in the center, and click the button.
Wouldn't it be nice if there were a periscope in the tower?
While you're pressing buttons, you should face the window that looks out on the island whose bridges you're turning, with the control panel between you and the window. Also note that you turn the panel by clicking on the arrows at the bottom, while you're in closeup view.
(If you're wondering "is there any kind of pattern to the placement of buttons/symbols," I do too, but I don't know what it is. Perhaps only to make the game more confusing...)
We need to turn the bridges so they connect to the jellyfish-shaped (or umbrella-clad) structure at the far end of each island. There's a control panel there, which we'll use to set some colored lights to the right spot.
You might have noticed by now that there are only four islands, not five. The fifth volcanic pump is hidden, clockwise from the island I've labeled "Island with Extra Bridges" on the map. Not sure why the game developers did this...I guess they were aiming for overkill with puzzle difficulty.
Here are the symbols for each island:
 Portal Island |
 Island with Extra Bridges |
 Volcano Island |
 Big Rock Island |
The position of the bridge sections is, unfortunately, random. I'd love to give you a step-by-step solution, but diagrams of the correct final bridge positions will have to suffice:
 Portal Island |
 Island with Extra Bridges |
 Volcano Island |
 Big Rock Island |
Now that you can get to the volcanic pumps, go ahead and travel to each island's umbrella-clad structure (remember to use the space-bar to jump if you get stuck on a bridge) and click on the spoked wheel until the correct color is showing in the framed square. The correct color order (from top to bottom) is: 5-Green, 4-Red, 3-Yellow, 2-Purple, 1-Blue. Only one color on each island will be in the correct order.
 Key |
 Portal Island - purple |
 Island with Extra Bridges - yellow |
 Volcano Island - red |
 Big Rock Island - green |
In order to set the fifth pump, we need to know the symbols associated with the extra bridge sections - the ones that wrap around the back of that large island between the "Island with Extra Bridges" and "Volcano Island."
Go to the pump control on the "Island with Extra Bridges." Go as far forward as you can, and climb up the rock on the right. See the extra bridge sections? Copy down the symbols...at least, the ones you can see. Also make note of which sections have to be turned, and how many times, because you can't see them from the tower. Go up to the tower and turn as many bridge sections as you can, then return and copy down the rest of the symbols now that you can actually see them. Then return to the tower and press more buttons, you know the drill.
Note: It may help you to remember that bridge sections turn only when they can make a connection with an existing path. If you hit the button for a bridge section and hear the buzzer instead of the sound of the section rotating, then you need to back up one section. This may save you a couple of trips back down to the island.
Symbols |
Completed Bridge |
 Island with Extra Bridges (Extra bridges shown at right) |
 Island with Extra Bridges (Extra bridges shown at right) |
|
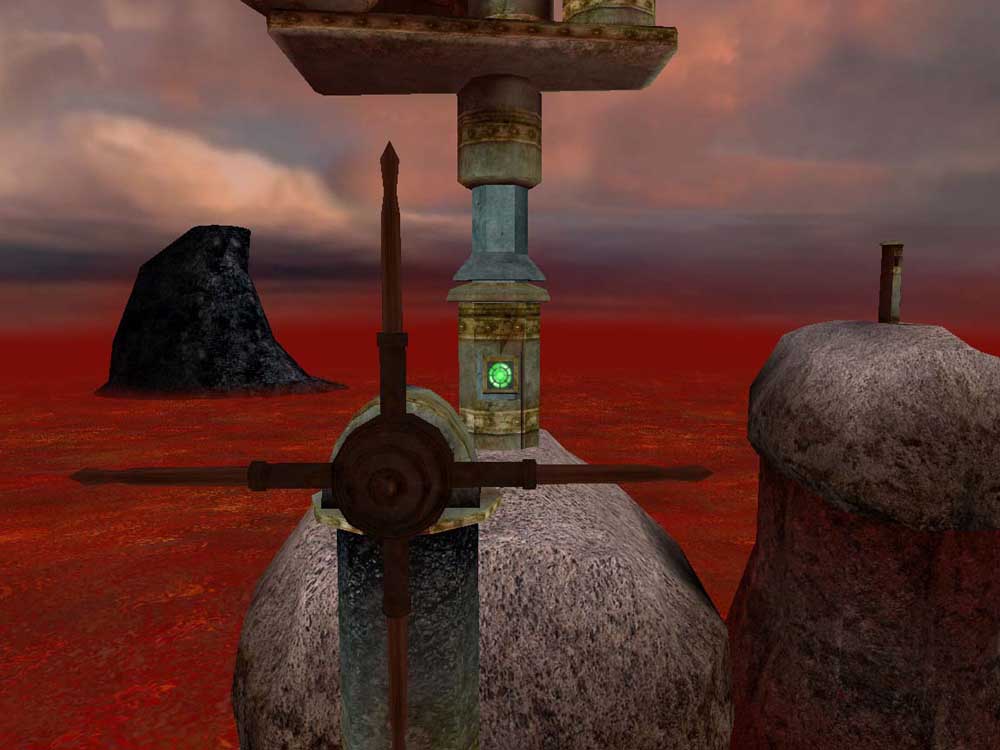
When you have the bridge complete, turn the volcanic pump wheel until blue is in the framed square. When you complete the fifth volcanic pump, your reward is a short cutscene of a wheel turning, and the gate blocking the crystal rotating down to free it. (What, that's it?!) Return to the building on the main island and grab it. Leave through the portal on "Portal Island" and place the crystal in the waystone in Tomb 35. (If this is the second or third crystal you've placed - other than the Tregett crystal - you may notice that two new portals have activated: Goda and Sanselard.) |
 |
| Fifth Volcanic Pump - blue |
 |
You have four tasks in Eska:
|
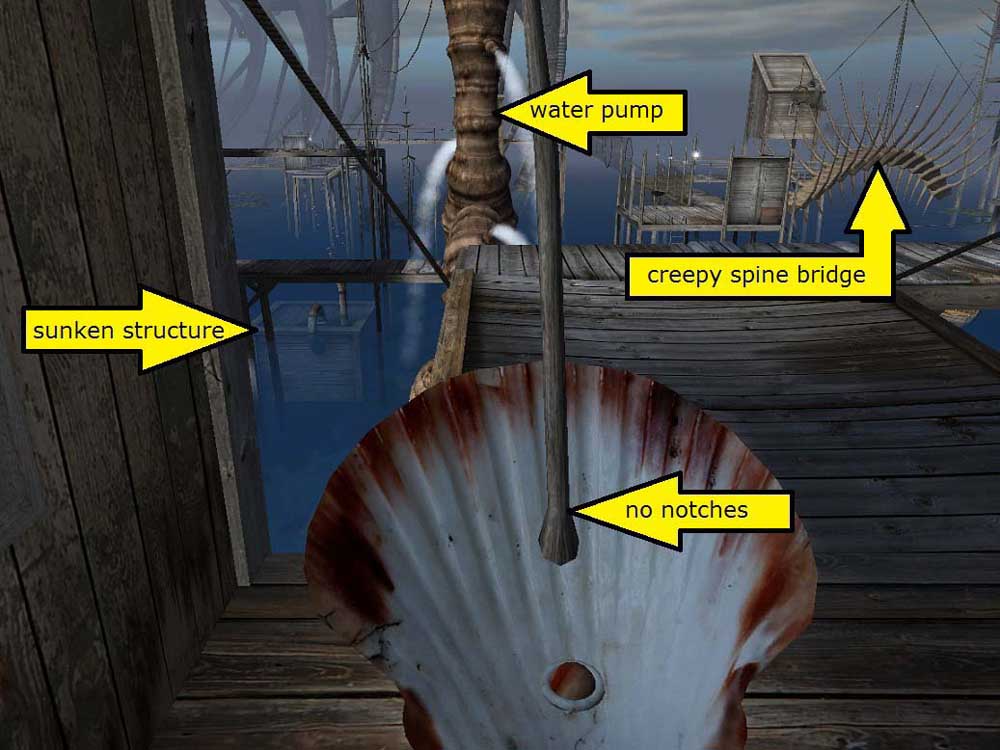
Hint: Rope length must match its color.
The object is make all the ropes the right length. You find out what the "right length" is by consulting the corresponding solution box (labeled on the map in red). Each ropes puzzle will raise a bridge, allowing you access to other piers.
You must move the spine bridge before you can get to the solution box for the 4-ropes puzzle, and solve the 4-ropes puzzle before you can get to the solution box for the 5-ropes puzzle.
Solutions: (note that all ropes start at position 7)
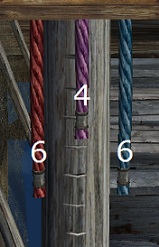 Click red once, purple 3x, and blue once. |
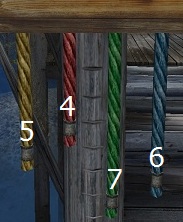 Click yellow 2x, red 3x, and blue once. |
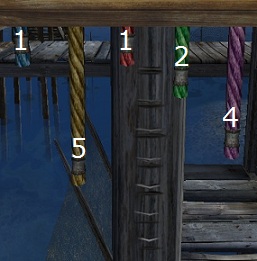 Click blue 6x, yellow 2x, red 6x, green 5x, and purple 3x. |
|
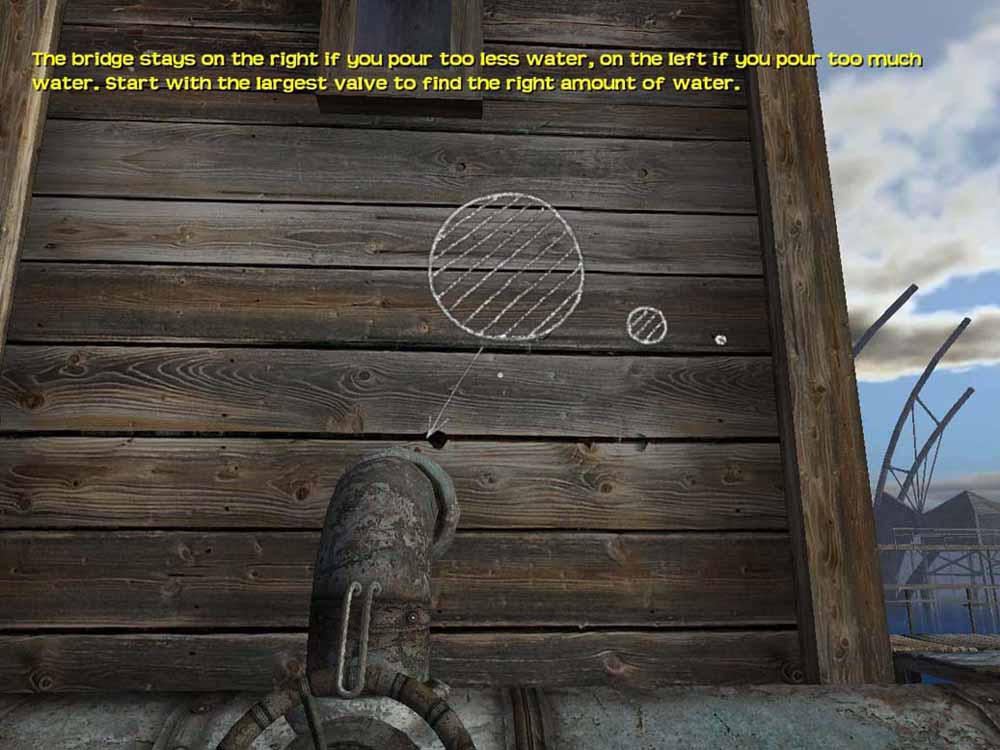
Hint: The bridge stays on the right if you pour too less water, on the left if you pour too much water. Start with the largest valve to find the right amount of water. (Of course they mean "too little water", not "too less water.") When you solve this puzzle, you'll have to use your imagination that water is pouring anywhere...there's no visual or auditory indication of it, that I can tell. In any event, your goal is to move the creepy spine bridge to the middle, so you can cross it. Do what the hint says and start with the largest valve, the one with the BIG circle pointing to it, which is the rightmost one (as you're facing the valves). Click on the bands around the wheel's outer ring to turn it. The circluar horn-shaped indicator will tell you if you're pouring more or less water - the horn gets larger as more water pours. Your goal for the largest and medium valves is to find the lowest setting that moves the bridge to the left. Then you set the valve to the next band smaller than that, and move on to the next valve. To test your settings, turn left and go to the end of the dock. Click on the lever and watch the cutscene. (Yes, it can be veeery tedious walking to the end of the dock and pulling that lever over and over.) |
 The Big Valve |
Example: I started with the band at 6 o'clock on the largest valve. The bridge didn't move, so I knew I needed more water. Then I tried the band four counter-clockwise from it (at what would be 9 o'clock). The bridge moved to the left. So, I knew I had to ease it down a bit. I had only three bands left to try before finding the right setting, because there are only three bands between the 6 o'clock and 9 o'clock positions. When I tried the band that's one counterclockwise from the 6 o'clock band, the bridge moved to the right. Two counterclockwise from 6 o'clock and the bridge moved left. So, the right setting was one counterclockwise from 6 o'clock.
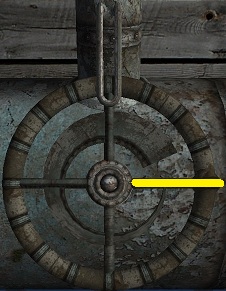
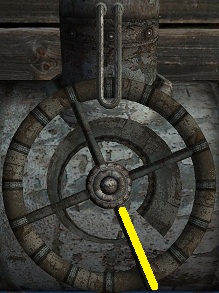
Solution: (the start position is marked with a yellow line)
 Smallest Valve (leftmost) |
 Medium Valve (middle) |
 Largest Valve (rightmost) |
When correctly done, the spine bridge moves to the middle, and you can cross it. On the other side is the solution box for the 4-ropes puzzle, and the shell with four notches on it.
|
Hint: Look for similar shells. The correct order is important. This puzzle is not difficult, but it's needlessly tiresome running around Eska getting to all the shells! To solve this puzzle, you must hit the button on each of six shells scattered around Eska in order from 0 to 5. Each shell has a spike of some sort sticking up out of it, with notches to indicate the number. Start with the shell with the dark-colored button and no notches (labeled "0" on the map). It activates the large spiral-shaped pump in the center of Eska. Note: Thankfully, hitting the button on an incorrect shell has no effect. It could just as easily have reset the puzzle... Finish with the shell labeled "5" on the map, and you will see a cutscene of a sunken structure being raised. Go slightly left then forward and right, and you can enter the structure and grab the crystal. That's it, Beni, you're outta here. |
 The "zero" shell |
With the crystals from Maru, Eska, and Corabanti placed in the waystone, it's time to choose another portal - Goda (on the lowest level - follow the path left from the original entrance point), or Sanselard (in the room with the staircase).
Goda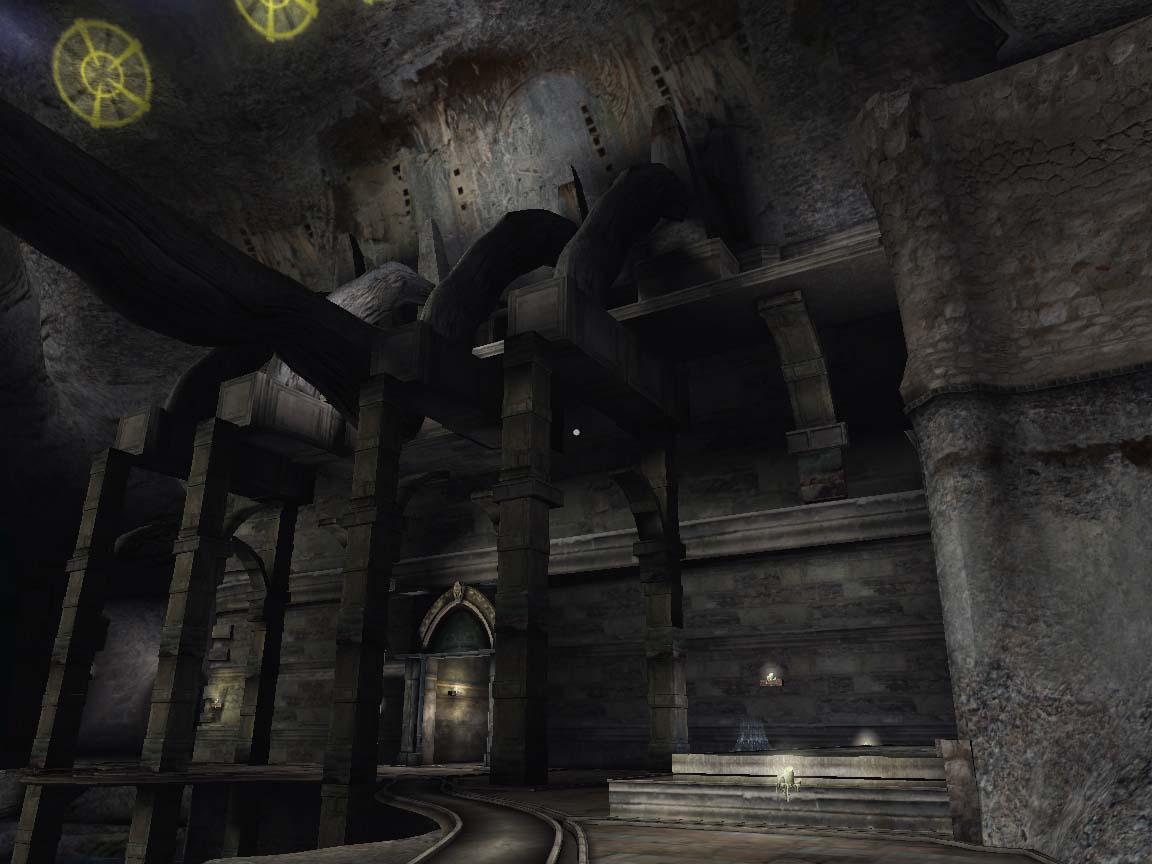 Underwater Pods |
Sanselard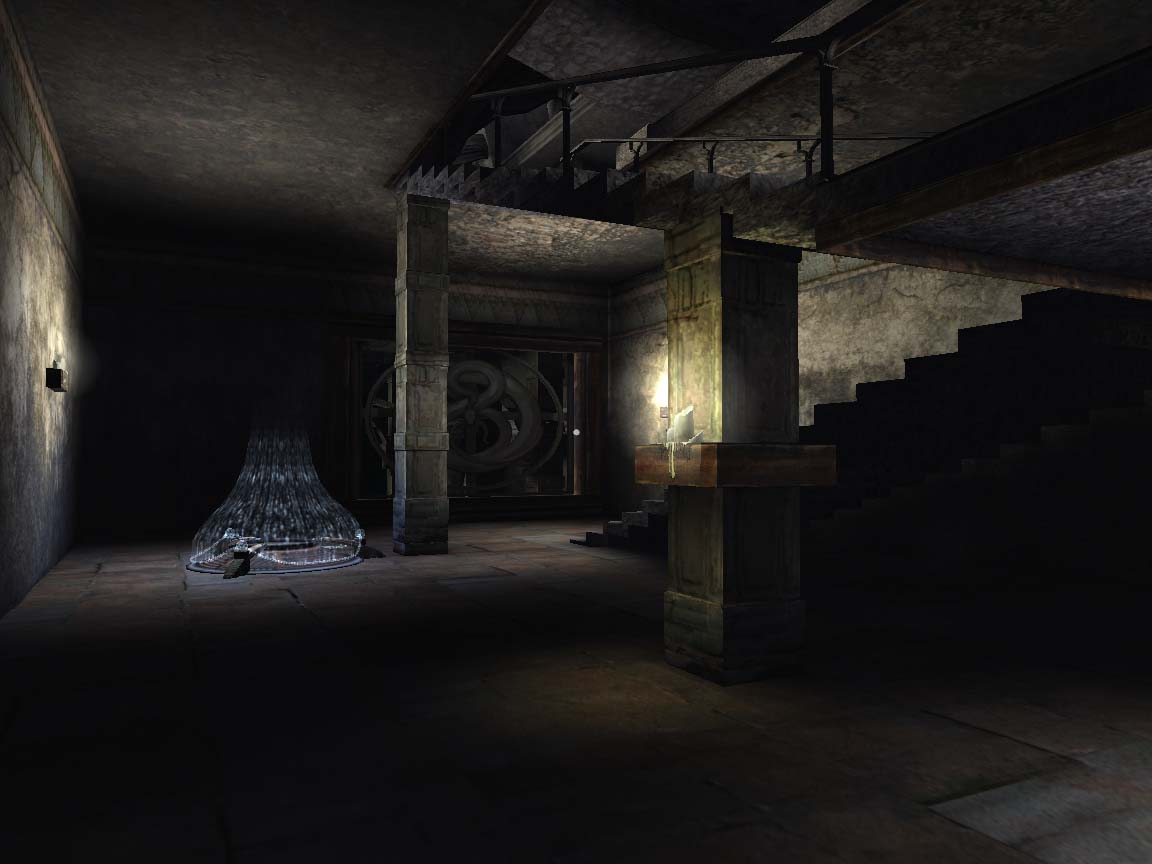 Winter World |
Follow the path until the cutscene with Dormeuse. Afterwards, reorient yourself and proceed further down the walkway through the automatic double-doors to the drawbridge control station.
Hint: Open your way to the lowest level by lowering appropriate drawbridges.
Hit the "5" button (on the right of the contraption that's before you) to go up to the 5th level. Look around - now you can actually see the drawbridges. Each level has two drawbridges you must lower - one leading into the level, and one leading down to the next level. You must figure out which two of the four levers you need to pull to lower the correct drawbridges for each level. Have fun running around! (And around, and around...)
|
Solution: Number the levers from left to right as 1 - 4.
|
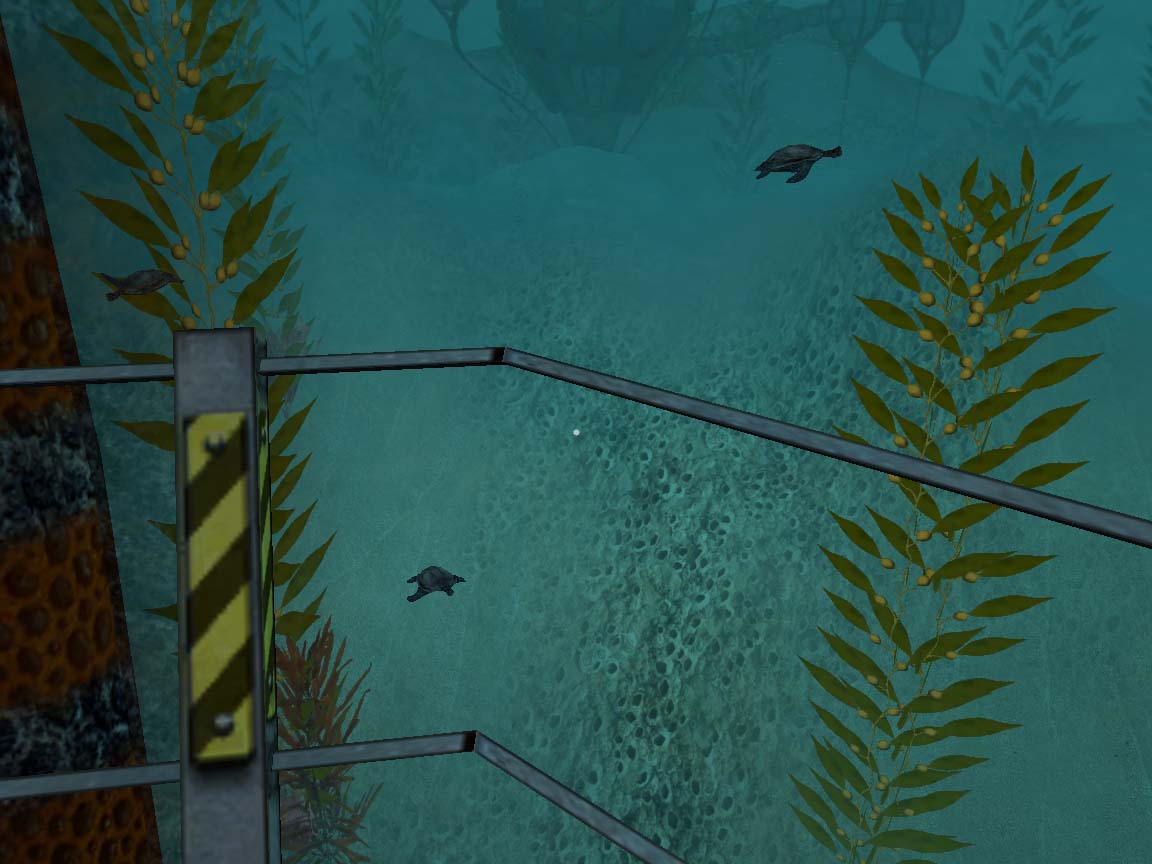 Goda Sea Turtles |
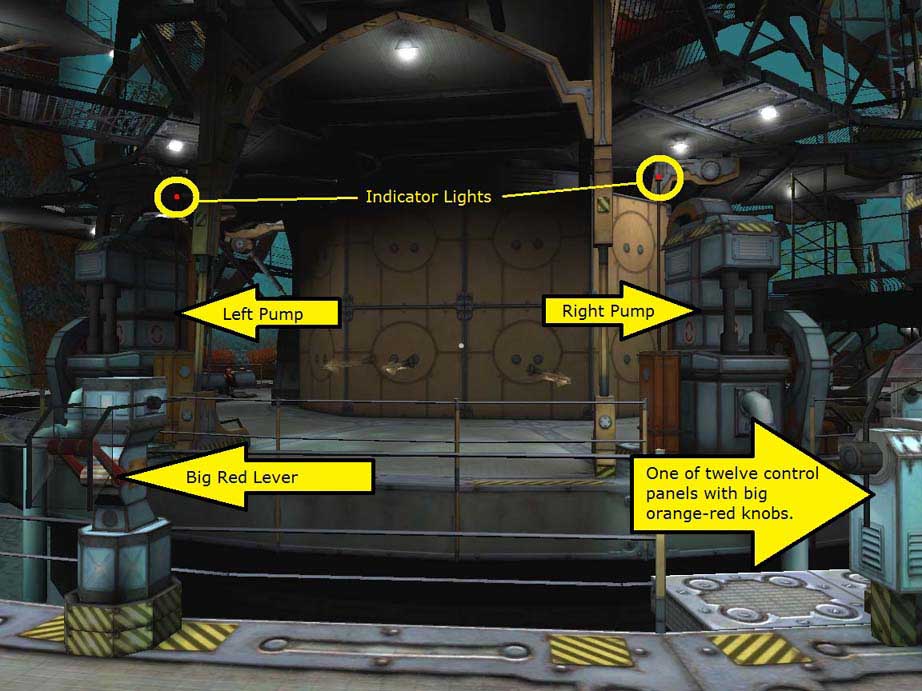
Go back up to the 5th level. Proceed down around the winding walkways to level 1. When you get there, turn left and go down the stairs. See a bunch of control panels with big orange-red knobs.
Hint: Two pumps make water level too high. Exactly seven levers are all you need to start.
|
As you face the staircase, go left past two of the panels with big orange-red knobs. Stop and look right. See a stand with a large red lever. Now look to the area just on the other side of the moat - see two large pumps. These are the pumps the hint is talking about. If they're both pumping (indicated by red lights), the water level will be too high. The large red lever activates the pumps. To enable the red lever, you need to activate exactly seven control panels. To activate a control panel, turn its big orange-red knob clockwise then move its lower lever from "0" to "1." The simplest way to proceed is to test each control panel (one at a time) to see which pump it activates (right or left). The pump won't actually pump water yet, but its indicator light will light up. From the staircase, number the control panels clockwise from 1 - 12.
|
 |
||||||
Seven control panels activate the left pump, and five, the right. Since we need seven to enable the big red lever, we'll use the left pump. Activate control panels 1, 3, 5, 7, 8, 10, and 11. Pull the big red lever, and see the bridge raise to the proper height. Walk left from the big red lever past three control panels and cross the bridge. Walk straight up to the panel with ten red switches.
|
Hint: Line up all the bolts in the middle position. Wow! A straightforward puzzle! Test each switch to see that it controls two bolts (see table). We need to move bolts 4, 8, 9, and 10. Solution: Click on levers 1, 9, and 10 (in any order).
Go around the panel, and through the door that's just opened. Walk to the other side of the drawbridge-control contraption, and the elevator goes up automatically to the top level. Grab the crystal, and head for the portal that's just activated. Watch (or skip) the cutscene with Dormeuse/Tamara. Then enter the portal. Place the crystal in the waystone in Tomb 35, or wait and do it when you complete Sanselard. |
|
 |
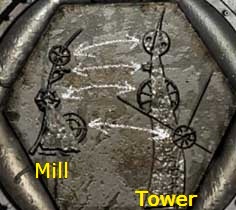
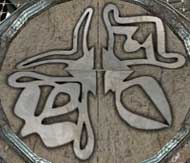
Hint: Match each tower with two mills then match sounds of those mills with two totems. Look for the visual clue. This one's a head-scratcher for sure. First, we need to find that visual clue. From the entrance point, turn right and go forward past the brown stand on your right (that's a totem), over the bridge. Follow the path and turn left where it forks. Go over the bridge. At the end of the bridge is the "visual clue." Walk around the large medallion in the ground to the steps. Walk up the steps and check out the diagram - it shows a mill and a tower. There's some correlation between their wheels, it seems. As you meditate on the diagram, look around at all the spinning wheels in Sanselard. How can you match them up? |
 Visual Clue |
Answer: Pick a tower, and match the direction its wheels are spinning with the direction the wheels are spinning on (not one but) two mills. Click on the dreamcatcher-like circle in the center of each mill, and write down a description of the sounds. Then find the totems that make those sounds when you click on them, and copy down the symbols flashing on them. Finally, enter those symbols on the tower's control panel.
When you have a tower's symbols entered correctly, its elevator platform descends to ground level. If that doesn't happen, you haven't entered the symbols correctly.
Note: You really only have to complete three towers, not all four.
Tables describing the totems, mills, and towers follow below. When it says "viewed from left" that means as you stand facing the tower or mill, walk left and look up. When it says "viewed from top", that refers to the wheel that's parallel to the ground (second from the top). ...Not that it matters where you view from, as long as you're consistent across all mills and towers.
Totems
|
Mills
Towers
|
As if all this wasn't enough to take in, the towers don't actually match any mills. They're each exactly opposite to two mills...except for that parallel wheel...which isn't opposite, it's the same. I believe I've taken intelligence tests that weren't this complicated!
 |
 |
 |
 |
| Tower 1 (W1) | Tower 2 (W2) | Tower 3 (W3) | Tower 4 (W4) |
Now that the tower elevators are working, you must go up to the top of each tower and synchronize the flashing white beams with each other.
|
Hint: All beams synchronized would release the piston and activate the elevator. As I said earlier, you really only have to complete three towers. You can then synchronize those towers' beams with the fourth (skipped) tower's beam. Just don't get lost figuring out which tower to synchronize to. Once you ascend the elevator to the top of a tower, turn around and go to the control panel at the end. The bands around the circle change the timing of the beam. Click on the band that's one left of top center. Wait for your beam. If it's not synchronized with another beam, click on that band again. Repeat until your beam is synchronized with another beam. Then repeat the procedure with the other towers. When all four beams are synchronized, there's a cutscene of that "visual clue" medallion falling away. Make your way to it, and step on it to activate an elevator. The ride down lasts twenty long seconds. At the bottom, go forward until you can't go any more - all the way to the fence. Then turn around. Slide right (with the "D" key by default) until you see a control panel. Go there. |
 |
Hint: Line up windows first and then try to open the entrance.
This puzzle seems simple...until you realize the dirty trick played on you - as soon as you have a door showing, and move on to the next further-most door, the door you had already set moves out of place. Grrr!
 Windows |
Solution: Click on the knob at right until it's in the lowest position. Click on the central wheel until the window (with the bar across the lower portion) shows. Note that this is not the window with bars at the top, because the "window with bars at the top" is actually the door! Click on the knob at the right to move it up one. Click on the wheel until the window (with bar across lower portion) shows. Repeat until you have that window showing all the way through. Now you're going to work your way back. With the right knob in the top position, click the wheel until the door (with bars at the top) shows. Move the knob down one. Click the wheel until the door shows. Move the knob down again, then turn the wheel, until doors are showing all the way through. Enter the doors and go for the crystal. Endure (or enjoy) the cutscene that interrupts your progress. After, take the crystal, go back up the elevator, find the portal, and get out of here! |
 Doors |
Place the Sanselard crystal in the waystone. A final portal activates, on the lowest level. From the original entrance point, follow the path left. The portal will be on your right, inside a very tall room.
|
You have two tasks in Argannas:
Not that I'm encouraging you, but if you really want to, you can completely skip #1 - all the puzzles are random, so I can't give complete solutions, Sorry! |
 |
Hint: Find similar objects and listen to their sounds. Find the same sounds, associate them with symbols, figure out the correct order and open door to the next sector.
|
The first door is forward and left of the portal, on the other side of the ramp. It's the only one whose wire cover is open right now. To open the door, you must go to the "crank warehouse," turn the cranks on all six posts, and figure out which three symbols' cranks sound the same. Copy down the symbols and the number of stripes on the posts with the matching sounds, then put the symbols in numeric order based on number of stripes. Enter the three symbols in order from low to high on the panel next to the door. Note: some of the symbols may appear reversed on the panel - it depends on which side of the post you looked at. The sounds are random, but the number of stripes and placement of symbols on posts is not. |
 Press the three that sound alike |
|
The second door is just inside the building from the first door, on the left. To open it, you must ring the seven bells lining the main street in this area, and figure out which three sound the same. Again, sounds are random, but placement of symbols and numeric order is not. The order is indicated by the number of knots on the rope the bell is hanging from. |
 Press the three that sound alike |
|
The third door is at the end of the main street with the bells. Go under the staircase - there's an opening on the right. To open the door, you must roll the seven barrels in the "barrel room," and copy down the symbols on the four barrels that sound the same. Numeric order is indicated by barrel size. Enter the symbols that sound the same, in size order from small to large. Sounds are random, but symbol placement on barrels is not. The staircases you must walk up to open door 4 start just inside door 3. |
 Press the four that sound alike |
|
The fourth door is across from the first, on the other side of the area with the ramps and portal, just inside the building. To open it, slowly walk up eight staircases, which start just inside the third door, and listen to the sounds of your footsteps. Midway up each staircase on the wall (either right or left) is the symbol associated with the sound of that staircase. Note that the sixth staircase has a landing in the middle, and is actually two staircases. (Dormeuse will usually talk to you when you're on this staircase, and you may even see a cutscene.) Copy down the symbols associated with the five staircases that sound the same, and order the symbols in the order you walk up the staircases. Then press those five symbols' buttons on the panel next to door 4, in order from first to last. Again, sounds are random, but the placement of symbols is not. |
 Press the five that sound alike |
|
You may get a little lost on this one - I did. You will find door 5 midway through solving this puzzle. To start, go through door 4 and proceed through the next nine doors, making note of which six sound alike when opened. (Instead, you could match the sounds of the doors closing, if you were so inclined.) After the first three doors, turn around and go up the stairs, then turn left. The next door is on the right. After the fifth door, go through the room then right down the orange stairs; the next door is on the left. After going through this (sixth) door, you will see "Door 5" on your right. Continue on, however, to the left, because you've got three more doors to open. Once you've opened nine doors, go back through three of them to door 5. Enter the symbols of the six similar sounding doors, in the order you opened them. As before, sounds are random, but symbol order is not. Bug Alert: Whether it's a bug or intentional, sometimes I find seven doors that sound alike. If this happens to you, simply eliminate one similar-sounding door from the sequence. If it doesn't work, eliminate a different one...and keep doing that until Door 5 opens. |
 Press the six that sound alike |
After opening Door 5, you have access to all areas of this ghost town.
The doors leading to the crystal are in the center of town, flanked by four panels with rectangular shapes on them. The solutions to these panels are on eight different birdhouses around town.
To start, zoom in on the first panel at the upper right. Press the red button and listen to the bird sounds. Now, go find the birdhouse that makes those sounds when you click on it (click on the whistle-like knob below the symbol plaque).
Once you find it, copy down the symbols on it. Then look up at the shape of the house. Somewhere in town is a matching birdhouse - one that doesn't make noise. Go find it, and copy down its symbols. Then return to the panel with the red button and enter the symbols on the panel. The birdhouse that makes noise goes on top; its match goes on the bottom.
When you have it right, the wire cover closes, and the next one opens. Solve the other three panels the same way as the first.
 |
 |
 |
 |
| Panel 1 | Panel 2 | Panel 3 | Panel 4 |
When all four are solved, enter the doorway between the four panels. It's an elevator, and it takes you about halfway up the building. Step out, find the stairwell, and go down. Cutscene with Dormeuse - she points out Ramirez' signature on the wall.

"Ramirez"
Explore Dormeuse's pad if you wish (do it now, cause you can't get back up here once you leave), then go back up the stairs and find the elevator. When you step in, it goes up. At the top, exit and go around to the crystal. Take it, then get back on the elevator. (NOTE: Remember to jump with the space-bar if you get caught on the floor trying to get in the elevator!)
The elevator goes all the way down to the ground. When you exit the building, a door closes, preventing your re-entry. Nothing to do but wonder why there's no puzzle involving the hanging sculptures around town...and then leave. Step into the portal back to Tomb 35.
Place the Argannas crystal in the waystone and see a cutscene of a platform raising up. (Question - why is Medusa on the building?) Go back to the lowest level of the tomb and enter the newly-raised building. Halfway through, something strange happens. Continue on to the end and emerge...back at the entrance. Cutscene of steps raising - now you can get to that building on your right.
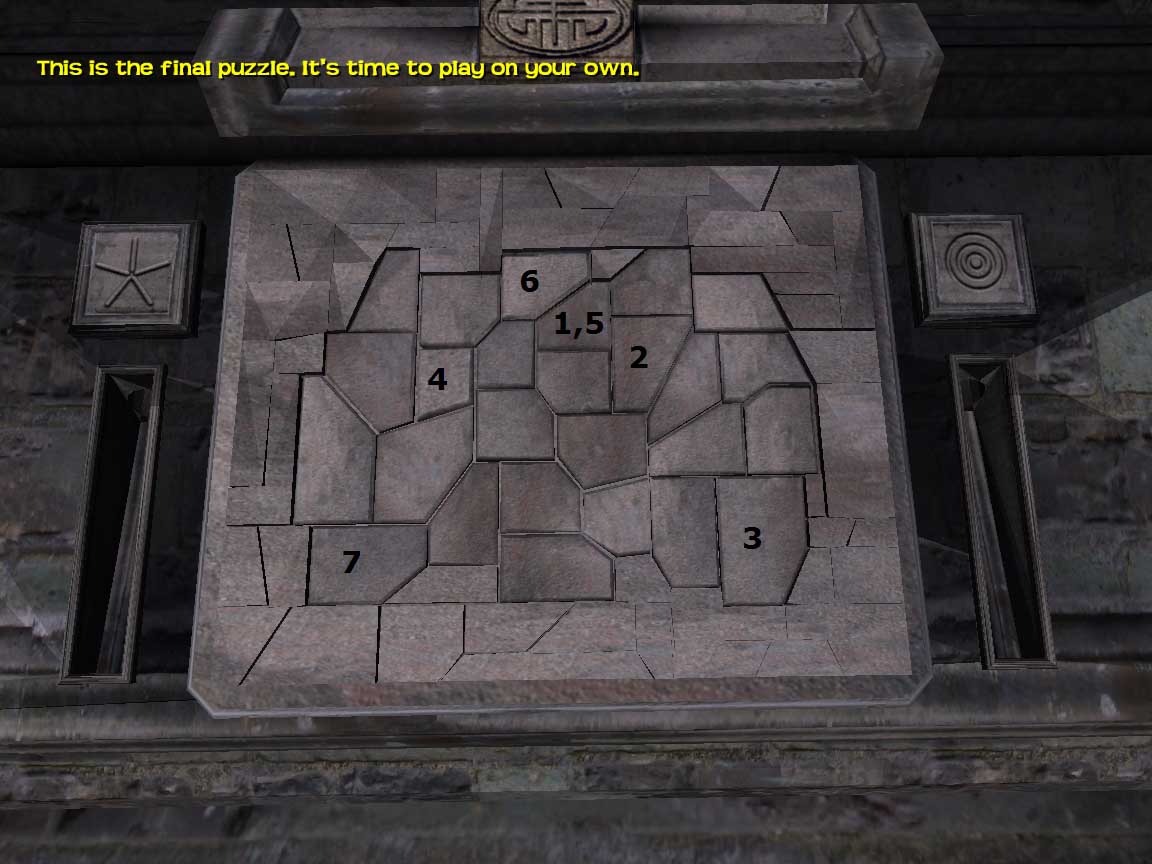
Hint: This is the final puzzle. It's time to play on your own.
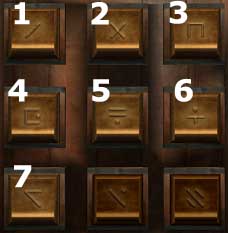
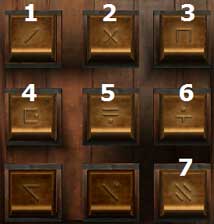
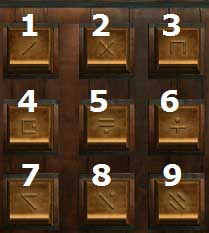
Click on some of the shapes and count the number of wooden balls that roll out the sides. On the left are spokes and on the right are circles. Match the number of wooden balls to the number of spokes and circles in the yellow symbols projecting on the ceiling of the tomb.
 |
|||||||
| Spokes: | 4 | 1 | 3 | 2 | 4 | 1 | 5 |
| Circles: | 2 | 1 | 3 | 4 | 2 | 5 | 4 |
|
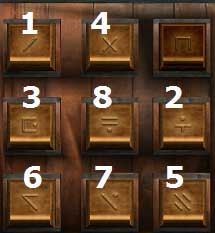
Click on the blocks in the order shown to spell out "Ramirez." Watch the final cutscene. Game over. I hope you were able to enjoy the excellent graphics in between being frustrated by the puzzles. If you find a mistake in this walkthrough (other than badly scaled maps), have a question or comment, please email margotbean! |
 |
Thanks to webfonts from MyFonts.com, you no longer have to download "Teen Bold" to see this page as designed!
Original images and descriptions are the property of Detalion/The Adventure Company. This page ©2010 margotbean.